whirlpool dryer repair manual pdf

Whirlpool dryer repair manuals are comprehensive guides providing detailed instructions for troubleshooting, maintenance, and repairs. They cover various models, including front-load gas and electric dryers, ensuring safe and efficient fixes.
Importance of Using the Repair Manual
Using a Whirlpool dryer repair manual is essential for ensuring safe and effective repairs. These manuals provide detailed instructions, wiring diagrams, and troubleshooting tips specific to your dryer model, helping you diagnose and fix issues accurately. They empower both professionals and DIY enthusiasts to perform repairs confidently, reducing the risk of further damage or safety hazards. By following the manual, you can avoid costly mistakes and extend the lifespan of your appliance. Additionally, repair manuals often include maintenance tips to prevent future problems, making them a valuable resource for long-term appliance care. Whether you’re addressing common issues like no heat or strange noises, or performing routine maintenance, the manual serves as an indispensable guide. It ensures that repairs are done correctly, saving time and money while keeping your dryer running efficiently.
How to Download the Whirlpool Dryer Repair Manual PDF
To download the Whirlpool dryer repair manual PDF, visit the official Whirlpool website or trusted appliance repair platforms like RepairClinic.com or ManualsLib. Use the model-specific lookup tool to find your dryer’s manual. Enter your model number, such as W11169659 or W11040040A, to access the corresponding PDF. These manuals are free and include detailed instructions, wiring diagrams, and troubleshooting guides. Once downloaded, you can print or save the manual for easy reference. Additionally, websites like Manualzilla and Servicemanuals.net offer comprehensive repair manuals for various Whirlpool dryer models. Ensure you verify the source for authenticity to avoid incorrect or unsafe information. Downloading the manual is a quick and efficient way to gain the knowledge needed for DIY repairs and maintenance.
Safety Precautions When Repairing Your Whirlpool Dryer
Before starting any repair, ensure your safety by following these precautions; Always unplug the dryer from the power source to avoid electrical shocks or injuries. For gas dryers, disconnect the gas line and ensure the area is well-ventilated. Wear protective gloves and safety glasses to prevent injuries from sharp edges or debris. Never bypass safety features or tamper with electrical components without proper knowledge. Keep children and pets away from the work area. If you suspect a gas leak, immediately turn off the supply and ventilate the room. Avoid using damaged or worn-out tools, as they may cause further damage or accidents. Consult the repair manual for specific safety guidelines related to your dryer model. By following these precautions, you can ensure a safe and successful repair process.
Troubleshooting Common Issues
Identify and resolve common Whirlpool dryer issues like no heat, poor drying, or strange noises using the repair manual’s diagnostic guides for quick and effective solutions.
No Heat or Not Heating Properly
If your Whirlpool dryer is not producing heat or heating properly, check the power supply and ensure the dryer is set to a heat cycle. Verify that the circuit breaker or fuse hasn’t tripped. Inspect the venting system for blockages, as restricted airflow can prevent proper heating. Consult the repair manual for guidance on testing the heating element, thermal fuse, and igniter. These components are common causes of heating issues. The manual provides step-by-step instructions for diagnosing and replacing faulty parts. Always unplug the dryer before performing any internal repairs. Refer to the wiring diagram in the manual for safe and accurate troubleshooting. By following the manual’s instructions, you can identify and resolve the issue efficiently, ensuring your dryer operates safely and effectively.
Dryer Not Turning On
If your Whirlpool dryer won’t turn on, start by checking the power supply. Ensure the dryer is properly plugged into a functioning outlet and that the circuit breaker or fuse hasn’t tripped. Verify that the dryer door is closed securely, as the door switch may prevent operation if it’s open. Check the start switch for damage or wear and test it with a multimeter if necessary. Consult the repair manual for specific instructions on testing the electrical components. If the thermal fuse has blown due to overheating, it may need to be replaced. Always unplug the dryer before performing internal repairs. Refer to the wiring diagram in the manual for guidance on diagnosing electrical issues. By following the manual’s troubleshooting steps, you can identify and address the problem effectively, ensuring your dryer operates safely and efficiently.
Clothes Not Drying Properly
If your Whirlpool dryer isn’t drying clothes properly, several factors could be at play. Check for clogged vents or lint buildup, as restricted airflow can significantly reduce drying efficiency. Ensure the dryer is not overloaded, as this can prevent clothes from tumbling freely. Verify that the heating element is functioning correctly, as a faulty element or malfunctioning thermostat can prevent proper heating. Consult the repair manual for guidance on testing these components. Additionally, ensure the moisture-sensing feature is clean and functioning, as it regulates drying time based on moisture levels. If issues persist, inspect the drum belt for wear or damage, as a broken belt can prevent the drum from turning. Refer to the manual for step-by-step instructions on diagnosing and resolving these common issues to restore optimal performance. Regular maintenance, such as cleaning the lint filter and venting system, can also help prevent future problems.
Strange Noises or Vibrations
Strange noises or vibrations in your Whirlpool dryer can indicate underlying issues that need attention. Common causes include a malfunctioning drum belt, worn-out drum rollers, or a failing idler pulley. A rattling sound may signal loose screws or debris inside the drum, while a scraping noise could point to metal-on-metal contact, often due to worn drum glides. Excessive vibration might be caused by an unbalanced dryer or a faulty shock absorber. Consult the repair manual for diagnostic steps, such as inspecting the belt for cracks or testing the rollers for smooth rotation. Replacing worn parts and ensuring proper installation can resolve these issues. Regular maintenance, like cleaning the lint filter and checking for blockages, can also prevent unusual noises. Always refer to the manual for specific instructions tailored to your dryer model to ensure safe and effective repairs. Addressing these problems promptly can prevent further damage and extend the dryer’s lifespan.
Disassembly and Reassembly Process
Disassembly involves removing the top and front panels to access internal components. Use specific tools like screwdrivers and wrenches, following the manual’s step-by-step guide. Ensure power is disconnected for safety.
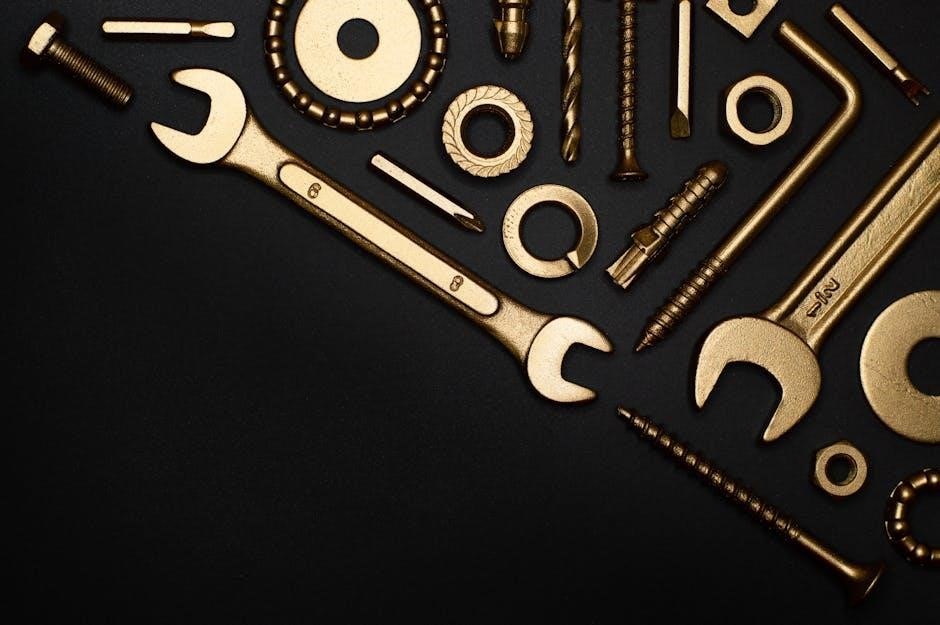
Tools and Equipment Needed
To successfully repair your Whirlpool dryer, gather the necessary tools and equipment. Essential items include a Phillips screwdriver, Torx screwdriver, wrench, pliers, and a putty knife for removing panels. A multimeter is useful for diagnosing electrical issues, while a vacuum cleaner helps clean lint and debris. Safety gear like gloves and safety glasses is crucial to protect yourself during disassembly. Ensure you have replacement parts ready, as specified in the repair manual. Organize your tools in a workspace with good lighting to streamline the process. Refer to the manual for model-specific tools, such as a drum belt tool or thermal fuse testers. Proper preparation ensures efficiency and safety when working on your dryer.
Step-by-Step Disassembly Guide
Disassembling your Whirlpool dryer begins with removing the lint filter and disconnecting the power supply for safety. Next, take out the screws at the back to remove the top panel. Gently pry the panel open using a flathead screwdriver or putty knife. Once the top is off, disconnect the wiring harness connected to the control panel. Remove the screws holding the control panel and set it aside. To access the drum, remove the front panel screws and carefully lift the panel off. The drum belt can then be slipped off, allowing the drum to be removed. For models with a heat pump, additional steps may be required to access internal components. Always refer to your specific Whirlpool dryer repair manual for detailed instructions, as disassembly steps may vary by model. Proper disassembly ensures safe and effective repairs.
Reassembly Tips and Tricks
Reassembling your Whirlpool dryer requires precision to ensure proper functionality. Start by aligning the drum and belt correctly, ensuring the belt is securely looped around the motor pulley. Reattach the front panel, making sure all screws are tightened evenly to avoid misalignment. When replacing the control panel, reconnect the wiring harness carefully to prevent damage or short circuits. Use the correct screwdriver size to avoid stripping screws. For models with a heat pump, ensure all internal components are properly seated before reassembling the outer panels. Refer to your Whirlpool dryer repair manual for specific reassembly instructions, as steps may vary by model. Double-check all connections and test the dryer at a low setting to ensure it operates smoothly. Proper reassembly is crucial for safety and efficiency, so take your time and follow the manual closely.
Replacing Common Parts
Replacing common parts in your Whirlpool dryer can be done with a repair manual. Parts like the heating element, drum belt, thermal fuse, and igniter are often replaced. Ensure to follow the manual’s instructions for each part to maintain safety and functionality. Always unplug the dryer before starting any repair to prevent accidents. Use the correct tools as specified in the manual, and make sure to purchase replacement parts that match your dryer’s model. Proper installation is crucial to ensure the dryer operates efficiently and safely. If you’re unsure about any step, consider consulting a professional to avoid further damage or hazards.
Heating Element Replacement
Replacing the heating element in your Whirlpool dryer is a common repair procedure. Start by disconnecting the power supply and allowing the dryer to cool. Access the heating element by removing the back panel or lower access panel, depending on your model. Use a screwdriver to remove the mounting screws and disconnect the electrical connections. Carefully pull out the old heating element and install the new one, ensuring proper alignment. Reconnect the electrical wires and secure the element with screws. Replace the panel and test the dryer to ensure it heats properly. Always refer to your Whirlpool dryer repair manual for specific instructions, as procedures may vary by model. Use genuine Whirlpool parts, such as part number 3387747, for optimal performance and safety. Proper installation is crucial to avoid further issues or potential fire hazards.
Drum Belt Replacement
Replacing the drum belt in your Whirlpool dryer is essential when it shows signs of wear or breaks, causing the drum to stop turning. Start by unplugging the dryer for safety. Remove the lint filter and access the top or front panel by taking out the screws. Gently lift the top or remove the front panel to expose the drum and belt. Use a screwdriver to release the belt tension by loosening the idler pulley. Carefully remove the old belt and discard it. Install the new belt, ensuring it is properly aligned and seated around the drum and pulleys. Tighten the idler pulley to secure the belt. Reassemble the panels and test the dryer to ensure smooth operation. Refer to your Whirlpool dryer repair manual for specific instructions, as procedures may vary by model. Use a genuine Whirlpool drum belt, such as part number 40111201, for reliability.
Thermal Fuse Replacement
The thermal fuse in your Whirlpool dryer is a critical safety component that prevents overheating. If it blows, the dryer will stop working. To replace it, unplug the dryer for safety. Locate the thermal fuse, usually found on the heating element or near the exhaust duct. Remove the back panel by taking out the screws. Disconnect the wires connected to the old fuse and remove it. Install the new thermal fuse, ensuring it is securely connected. Reattach the back panel and plug in the dryer. Test the dryer to confirm it heats properly. Always use a genuine Whirlpool thermal fuse, such as part number 3392519, to ensure compatibility and safety. Refer to your Whirlpool dryer repair manual for specific instructions, as the location may vary slightly depending on the model. Proper replacement ensures your dryer operates safely and efficiently.
Igniter Replacement
The igniter in your Whirlpool dryer is responsible for lighting the gas burner to heat the dryer. If the igniter is faulty, the dryer won’t heat properly. To replace it, start by unplugging the dryer for safety. Locate the igniter, typically found near the burner assembly. Remove the back panel by taking out the screws. Disconnect the wire connector from the old igniter and remove the mounting screws. Install the new igniter, ensuring it is securely fastened and the wire connector is properly attached. Reassemble the dryer and plug it back in. Test the dryer to confirm it heats correctly. Use a genuine Whirlpool igniter, such as part number 279311, for compatibility. Refer to your Whirlpool dryer repair manual for model-specific instructions, as the location may vary slightly. Proper replacement ensures reliable heating and safe operation of your dryer.
Understanding Error Codes
Whirlpool dryer error codes help diagnose issues like E1 (temperature sensor fault) or E2 (moisture sensor issue). Refer to your manual for specific code meanings and reset instructions.
Common Error Codes and Their Meanings
Whirlpool dryers display error codes to indicate specific issues. Common codes include E1 (temperature sensor fault), E2 (moisture sensor issue), and E3 (high-temperature error). These codes help diagnose problems like faulty sensors, blocked vents, or overheating. For example, E1 often points to a malfunctioning temperature sensor, while E2 may indicate a moisture sensor failure. Understanding these codes allows users to identify the root cause of the problem quickly. Referencing the repair manual is essential, as it provides detailed explanations and solutions for each code. Some codes, like E4 (communication error), may require professional assistance. By addressing these codes, users can perform timely repairs and prevent further damage to their dryer. Always consult the manual for specific code meanings and troubleshooting steps to ensure safe and effective fixes.
How to Reset Error Codes
Resetting error codes on your Whirlpool dryer can often resolve issues without advanced troubleshooting. Start by unplugging the dryer from the power source for 30 minutes to reset the control board. Plug it back in and run a test cycle to see if the error clears. For some models, pressing and holding the “Start” or “Cancel” button for 5-10 seconds can also reset the system. If the error persists, ensure all sensors and components are functioning properly, as the code may indicate a specific fault. Always refer to your repair manual for model-specific reset instructions, as procedures can vary; Resetting error codes is a simple first step in diagnosing and resolving issues with your Whirlpool dryer.
Advanced Error Code Diagnostics
Advanced error code diagnostics for Whirlpool dryers involve interpreting specific codes to identify complex issues. Error codes like E1, E2, and E3 often indicate problems with sensors or internal components. For example, E1 may signal a faulty thermostat, while E2 could point to a malfunctioning moisture sensor. To diagnose these issues, consult the repair manual for detailed explanations of each code. Advanced troubleshooting may require using a multimeter to test electrical connections and components. Additionally, checking the wiring diagram in the manual can help locate faulty circuits. Always ensure the dryer is unplugged before performing any advanced diagnostics to avoid electrical hazards. By understanding the meaning behind each error code, you can pinpoint the root cause and address it effectively, ensuring your Whirlpool dryer operates smoothly. Refer to the manual for model-specific guidance and safety precautions.
Maintenance Tips to Prevent Future Repairs
Regular maintenance is key to extending the life of your Whirlpool dryer and preventing costly repairs. Start by cleaning the lint filter after every use to ensure proper airflow and reduce fire risks. Additionally, inspect and clean the venting system annually to remove built-up lint and debris, which can cause inefficiency or safety hazards. Check the dryer’s moisture sensors and ensure they are free from dirt or damage, as malfunctioning sensors can lead to improper drying. Regularly inspect the drum belt for signs of wear and tear, and replace it if necessary to avoid sudden breakdowns. Also, ensure the dryer is properly leveled to prevent vibrations and noise. Refer to your Whirlpool dryer repair manual for specific maintenance schedules and procedures tailored to your model. By following these tips, you can keep your dryer running efficiently and avoid future repairs.
When to Call a Professional
While DIY repairs can save time and money, there are situations where it’s best to call a professional. If you encounter complex issues like electrical malfunctions, gas line problems, or significant damage to internal components, seek expert help. Additionally, if you’re unsure about diagnosing or fixing a problem, a professional can ensure safety and prevent further damage. For instance, if your dryer’s heating element or control board fails, it’s often safer to let a certified technician handle the repair. They have the tools and expertise to address advanced issues efficiently. Moreover, if you’ve attempted repairs but the problem persists, it’s time to consult a professional. Always choose a certified Whirlpool technician to guarantee quality service and avoid voiding your warranty. Remember, safety should always come first when dealing with appliance repairs.
The Whirlpool dryer repair manual is an invaluable resource for both professionals and DIY enthusiasts. It provides comprehensive guidance on troubleshooting, maintenance, and repairs, ensuring your dryer operates efficiently. By following the manual, you can address common issues like no heat, strange noises, or error codes, saving time and money. The manual also emphasizes safety, a critical aspect of any repair. Regular maintenance, as outlined, can prevent future problems and extend the lifespan of your appliance. While DIY repairs are cost-effective, knowing when to call a professional is equally important, especially for complex issues. With the Whirlpool dryer repair manual, you’re equipped to handle repairs confidently, ensuring your dryer runs smoothly for years to come. Always prioritize safety and use genuine parts for optimal performance.
Additional Resources
For further assistance with your Whirlpool dryer repair, explore these additional resources. Websites like RepairClinic.com and ManualsLib offer free PDF manuals, diagrams, and repair guides. YouTube channels specializing in appliance repairs provide step-by-step video tutorials for common fixes. Whirlpool’s official website also offers model-specific manuals and troubleshooting guides. Additionally, forums and communities dedicated to DIY repairs can offer valuable insights and tips from experienced users. These resources complement the repair manual, ensuring you have all the tools and information needed to maintain and repair your dryer effectively. Always refer to trusted sources to ensure accuracy and safety in your repair journey.